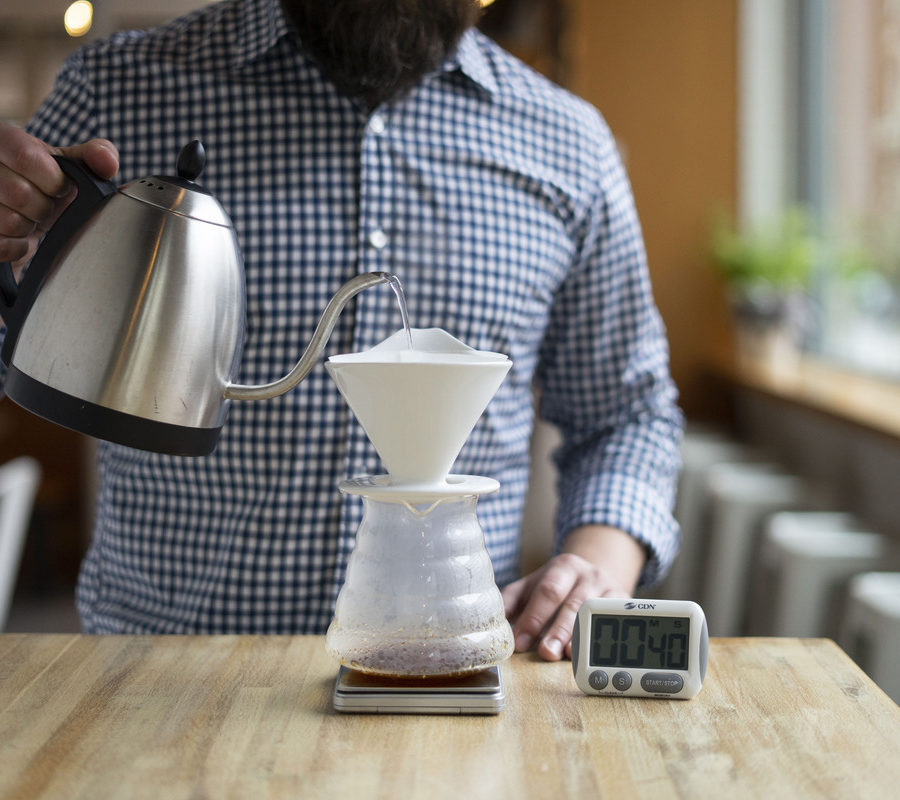
Drip cone
Filter
Decanter or cup
Scale
Filtered water
Coffee
Grinder
Kettle
Save 10% on Every Coffee Order, Forever
Customize your subscription and save on any delicious blend or single-origin coffee.
Shop Now

Drip Cone Brew Guide
Tips for making coffee special with your drip cone.
Equipment
Set-up
Heat your brew water to between 205°F and 210°F. You’ll want water at the cooler end for darker roasts and the hotter end for lighter roasts.
For drip cones, start around 1:16 (for every 1 gram of coffee, use 16 grams of water) for most of our single origin coffees. Adjust your water based on flavor preference. For a stronger cup of coffee, or if using a darker roast (Mass Appeal, Destroyer, etc.), try using a 1:15.5 recipe. For a lighter cup of coffee, or if using a lighter roast, try using a 1:16.5 recipe.
If your bag of coffee has been open for longer than a week or so, you might prefer a stronger recipe (what tasted great at 1:16, after a week or so of use might taste better to you at 1:15.5 or 15.8).
For most drip cones, a medium-medium-fine grind is a reasonable starting point. If the coffee tastes unpleasantly sharp/vegetal/under-ripe fruit, grind finer. If the coffee tastes bitter/flat/dull/dry/bland, grind coarser.
Our recommendations are starting points. Adjust to suit your flavor preferences.
Process
With your heated water, ground coffee, scale, brewer and decanter, we’re ready to start making a cup of coffee.
Fold your paper filter along the seam (if applicable) and set in drip cone.
With your drip cone set on your decanter or cup, thoroughly rinse the paper filter.
Dump the rinse water.
Set brewer and decanter/cup on a scale and make sure your scale is on and reading 0.0 grams.
Carefully dose grounds into center of dripper.
Note the dose weight and multiply by 16 (or your preference adjusted number), and re-zero scale.
Gently shake drip cone to level off grounds.
Create a small divot in the center of the leveled grounds (loosely mimicking the shape of the cone).
Start pouring your water in the center of the grounds, slowly spiraling out to cover all grounds to bloom the coffee. (“Blooming” refers to releasing stored carbon dioxide from the grounds—you’ll likely see the coffee start to bubble some.) Use a solid 3x as much water as coffee to bloom.
Firmly swirl slurry and let sit for about 30 seconds. You should see the off-gassing finish in this time. (“Slurry” refers to the mixture of coffee grounds and hot water in your brewer.)
Resume pouring with a controlled pace working in spirals, from center toward perimeter and back again, continually pouring, keeping the drip cone fairly topped off. Continue until all water is added. You may pour in several long pours if needed.
When you feel like you’re not going to spill hot liquid on yourself, gently swirl dripper a few times.
Allow dripper to drain.
Discard filter and grounds, pour and drink.


